> ## Documentation Index
> Fetch the complete documentation index at: https://auth0.generaltranslation.app/llms.txt
> Use this file to discover all available pages before exploring further.
> エンタープライズ接続を使用して、Okta を OpenID Connect (OIDC) アイデンティティ プロバイダーとして接続する方法を学びます。
# Auth0 アプリケーションと Okta Workforce Enterprise Connection を接続する
Okta Workforce Enterprise Connection は公式にサポートされているシンプルな統合であり、Okta を Auth0 の Identity Provider(IdP)として実装するための推奨方法です。
この統合により、お客様は Okta を使用して、従業員によるお客様のアプリケーションへのアクセスを管理できます。
さらに、顧客アイデンティティ管理に Auth0 を、社内のワークフォース アイデンティティ管理に Okta を使用している場合、この統合により、両方のアイデンティティ領域を効果的に管理できます。
Okta Workforce Enterprise Connection がお客様のユースケースをサポートしない場合は、[Okta を SAML IdP として構成](/docs/ja-JP/authenticate/protocols/saml/saml-sso-integrations/configure-auth0-saml-service-provider/configure-okta-as-saml-identity-provider)するか、ニーズに合わせて[カスタム認可サーバーを構成](https://developer.okta.com/docs/concepts/auth-servers/#custom-authorization-server)できます。
## Okta OIDC アプリ統合を作成する
Okta OIDC アプリ統合の作成方法については、[Okta Help Center の「Create OIDC app integrations」](https://help.okta.com/en-us/Content/Topics/Apps/Apps_App_Integration_Wizard_OIDC.htm) を参照してください。
Okta OIDC アプリ統合を設定するときは、次の設定を使用します。
1. **Sign-in method** に **OIDC** を選択します。
2. **Application type** に **Web application** を選択し、次のパラメーターを設定します。
| Field |
Description |
| Name |
アプリケーションの名前。 |
| Sign-in Redirect URIs |
`https://{YOUR_AUTH0_TENANT}.{YOUR_TENANT_REGION}.auth0.com/login/callback` |
| Trusted Origins |
`https://{yourDomain}` |
上記に Auth0 ドメイン名が表示されておらず、かつ [custom domains](/docs/ja-JP/customize/custom-domains) 機能を使用していない場合、ドメイン名はテナント名、リージョンのサブドメイン、および `auth0.com` をドット(`.`)で連結したものになります。
例えば、テナント名が `exampleco-enterprises` でテナントが米国リージョンにある場合、Auth0 ドメイン名は `exampleco-enterprises.us.auth0.com`、**Redirect URI** は `https://exampleco-enterprises.us.auth0.com/login/callback` になります。
ただし、テナントが米国リージョンにあり、かつ 2020 年 6 月より前に作成された場合、Auth0 ドメイン名は `exampleco-enterprises.auth0.com` となり、**Redirect URI** は `https://exampleco-enterprises.auth0.com/login/callback` になります。
[custom domains](/docs/ja-JP/customize/custom-domains) を使用している場合、**Redirect URI** は `https:///login/callback` になります。
3. Okta がアプリ統合用に生成する **Client ID** と **Client Secret** を控えておいてください。
## Okta アプリ統合にテストユーザーを追加する
Okta Directory でテスト用ユーザーを作成し、そのユーザーでアプリ統合をテストします。
1. Okta Admin Dashboard で **Directory > People** に移動します。
2. **Add Person** を選択します。
3. パスワードを含むテスト用ユーザーの詳細情報を入力します。
4. テスト用ユーザーを保存します。
5. **Directory** で新しく作成したユーザーを選択します。
6. そのユーザーの **Applications** タブに移動し、**Assign Applications** を選択します。
7. 以前に作成したアプリケーション名を選択します。
## Auth0 で Okta Workforce Enterprise Connection を作成する
Okta OIDC アプリ統合の **Client ID** と **Client Secret** を用意しておきます。
1. [Auth0 Dashboard > Authentication > Enterprise](https://manage.auth0.com/#/connections/enterprise) に移動し、**Okta Workforce** を見つけて、**+** ボタンを選択します。
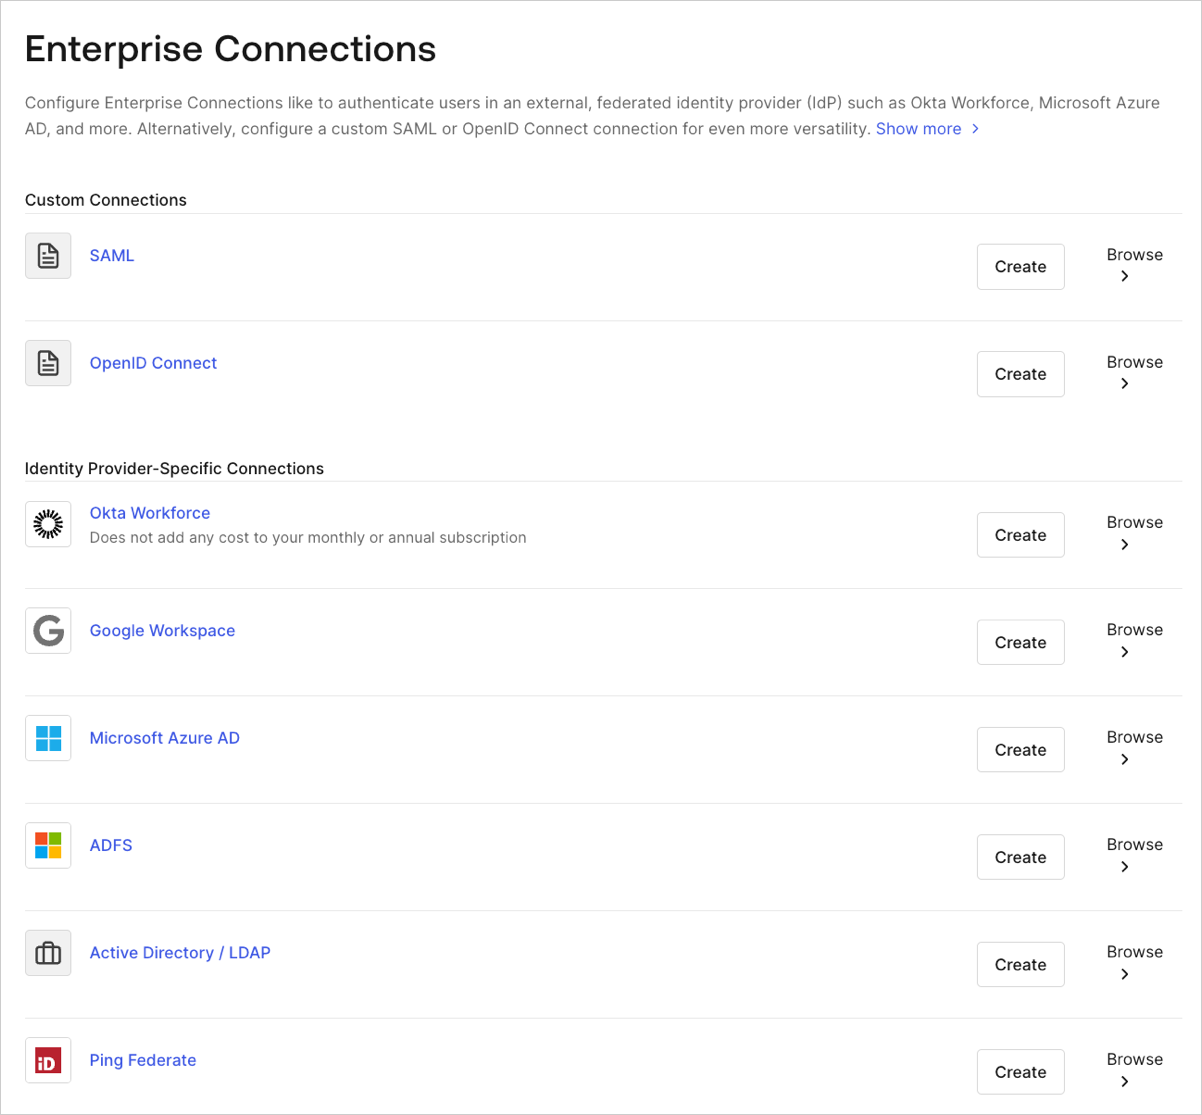 2. Connection の詳細を入力し、**Create** を選択します。
| 項目 |
説明 |
| Connection name |
Connection の論理識別子です。テナント内で一意である必要があります。一度設定すると、この名前は変更できません。 |
| Okta Domain |
組織向けの Okta のドメイン名です。 |
| Client ID |
登録済み Okta アプリケーションの一意の識別子です。Okta 管理コンソールで直前に登録したアプリの Client ID として保存した値を入力します。 |
| Client Secret |
登録済み Okta アプリケーションへのアクセスを得るために使用される文字列です。Okta 管理コンソールで直前に登録したアプリの Client Secret として保存した値を入力します。 |
3. **Provisioning** ビューで、Auth0 内でユーザープロファイルが作成および更新される方法を構成します。
| 項目 |
説明 |
| Sync user profile attributes at each login |
有効にすると、Auth0 は各ユーザーのログインのたびにユーザープロファイルデータを自動的に同期し、接続元で行われた変更が Auth0 に自動的に反映されるようにします。 |
| Sync user profiles using SCIM |
有効にすると、Auth0 で SCIM を使用したユーザープロファイルデータの同期が可能になります。詳細は、インバウンド SCIM を構成するを参照してください。 |
4. **Login Experience** ビューに切り替え、この Connection を使用したユーザーのログイン方法を構成します。
| 項目 |
説明 |
| Home Realm Discovery |
ユーザーのメールアドレスのドメインを、指定されたアイデンティティ プロバイダーのドメインと比較します。詳細は、Identifier First 認証を構成するを参照してください。 |
| Display connection button |
このオプションでは、アプリケーションの Connection ボタンをカスタマイズするための、次の選択肢を表示します。 |
| Button display name (Optional) |
Universal Login のログインボタンをカスタマイズするために使用されるテキストです。設定すると、ボタンには「Continue with \{Button display name}」と表示されます。 |
| Button logo URL (Optional) |
Universal Login のログインボタンをカスタマイズするために使用される画像の URL です。設定すると、Universal Login のログインボタンに 20px × 20px の正方形として画像が表示されます。 |
オプションのフィールドは Universal Login のみで利用できます。Classic Login を使用しているお客様には、Add ボタン、Button display name、Button logo URL は表示されません。
## Auth0 アプリケーションで接続を有効にする
新しい Okta Workforce Enterprise 接続を使用するには、Auth0 Applications に対して[接続を有効にする](/docs/ja-JP/authenticate/identity-providers/enterprise-identity-providers/enable-enterprise-connections)必要があります。
## 接続をテストする
これで、[接続をテスト](/docs/ja-JP/authenticate/identity-providers/enterprise-identity-providers/test-enterprise-connections)する準備が整いました。
## グローバル トークン失効を設定する
この接続タイプは Global Token Revocation エンドポイントをサポートしており、対応しているアイデンティティ プロバイダーが Auth0 ユーザー セッションを失効させ、リフレッシュトークンを失効させ、安全なバックチャネルを使用するアプリケーションに対してバックチャネル ログアウトをトリガーできるようにします。
この機能は Okta の Universal Logout と併用できます。
詳細および構成手順については、[Universal Logout](/docs/ja-JP/authenticate/login/logout/universal-logout) を参照してください。
## 詳細情報
* [拒否された認可権限の処理](/docs/ja-JP/authenticate/identity-providers/social-identity-providers/reprompt-permissions)
* [パラメータをアイデンティティ プロバイダーに渡す](/docs/ja-JP/authenticate/identity-providers/pass-parameters-to-idps)
* [認証および認可フロー](/docs/ja-JP/get-started/authentication-and-authorization-flow)