> ## Documentation Index
> Fetch the complete documentation index at: https://auth0.generaltranslation.app/llms.txt
> Use this file to discover all available pages before exploring further.
> Token Vault の構成方法について学びます。
# Token Vault の構成
ユーザーが[サポートされている外部プロバイダー](/docs/ja-JP/secure/tokens/token-vault#supported-external-providers)で認証し、接続を許可すると、アプリケーションは Token Vault にアクセスして、Auth0 のトークンを外部プロバイダーのアクセストークンと交換できます。
Token Vault を構成するには、次の操作が必要です。
1. サポートされているソーシャルまたはエンタープライズ接続に対して、[Token Vault 用に接続済みアカウントを構成](/docs/ja-JP/secure/tokens/token-vault/configure-token-vault#configure-connected-accounts-for-token-vault)します。
2. Token Vault 用のグラントタイプを使用するように[アプリケーションを構成](#configure-application)します。
3. アプリケーションでのトークン交換を構成します。
* [リフレッシュトークンの交換](#configure-refresh-token-exchange)
* [アクセストークンの交換](#configure-access-token-exchange)
過去に Auth0 Dashboard で MFA(多要素認証)ポリシーを **Always** に設定している場合、Token Vault からアクセストークンを取得するには、これを **Never** に設定し直す必要があります。そうしないと、エラーが返されます。さまざまな MFA ポリシーの詳細については、[Auth0 Dashboard で MFA を有効化する](/docs/ja-JP/secure/multi-factor-authentication/enable-mfa#enable-mfa-in-the-auth0-dashboard)を参照してください。
対話型フローで MFA チャレンジをトリガーする必要がある場合は、[テナントの MFA を設定する](/docs/ja-JP/secure/multi-factor-authentication/customize-mfa/customize-mfa-selection-universal-login#prepare-your-tenant)際に **Customize MFA Factors using Actions** を有効にします。その後、`event.transaction.protocol` プロパティに基づいて MFA チャレンジをトリガーするために Action を使用できます。詳細については、[Universal Login の MFA 選択をカスタマイズする](/docs/ja-JP/secure/multi-factor-authentication/customize-mfa/customize-mfa-selection-universal-login)を参照してください。
## Token Vault 用 Connected Accounts を構成する
Token Vault 用の Connected Accounts は、複数の外部アカウントにリンクされた統合された Auth0 ユーザー プロファイルを管理します。その後、アプリケーションは Token Vault に保存された認証情報を取得し、ユーザーに代わって外部 API とやり取りします。
サポートされているソーシャル接続およびエンタープライズ接続について、Token Vault 用の Connected Accounts を構成できます。詳しくは、[Connected Accounts の構成](/docs/ja-JP/secure/tokens/token-vault/connected-accounts-for-token-vault#configure-connected-accounts) を参照してください。
## アプリケーションの構成
Token Vault グラントタイプを使用するようにアプリケーションを構成するには、Auth0 Dashboard または Management API を使用します。
Token Vault グラントタイプを使用できるクライアントのタイプには制限があります。
1. クライアントはファーストパーティ クライアントである必要があります。つまり、`is_first_party` プロパティが `true` である必要があります。
2. クライアントは有効な認証メカニズムを持つ機密クライアントである必要があります。つまり、`token_endpoint_auth_method` プロパティを `none` に設定してはいけません。
3. クライアントは OpenID Connect (OIDC) 準拠である必要があります。つまり、`oidc_conformant` プロパティが `true` である必要があります。
1) **Applications > Applications** に移動します。
2) 構成するアプリケーションを選択します。
3) **Advanced Settings > Grant Types** で **Token Vault** グラントタイプを選択します。
4) **Save Changes** を選択します。
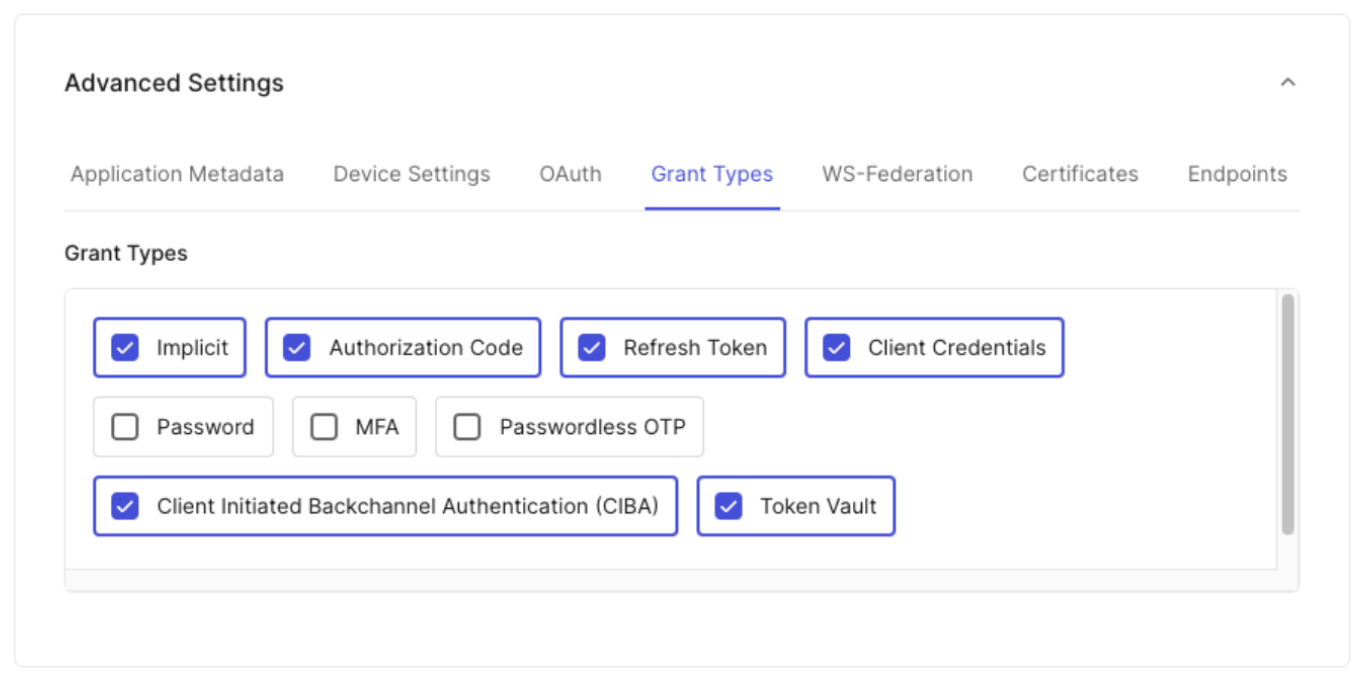 アプリケーションで Token Vault を有効にするには、[Update a Client](https://auth0.com/docs/api/management/v2/clients/patch-clients-by-id) エンドポイントに対して `PATCH` コールを行い、`urn:auth0:params:oauth:grant-type:token-exchange:federated-connection-access-token` グラントタイプをクライアントの JSON オブジェクトに追加します。
```bash lines theme={null}
curl --location --request PATCH 'https://{yourDomain}/api/v2/clients/{clientId}' \
--header 'Content-Type: application/json' \
--header 'Authorization: Bearer ' \
--data '{
"grant_types": [
"authorization_code",
"refresh_token",
"urn:auth0:params:oauth:grant-type:token-exchange:federated-connection-access-token"
]
}'
```
アプリケーションで Token Vault を有効にするには、[Update a Client](https://auth0.com/docs/api/management/v2/clients/patch-clients-by-id) エンドポイントに対して `PATCH` コールを行い、`urn:auth0:params:oauth:grant-type:token-exchange:federated-connection-access-token` グラントタイプをクライアントの JSON オブジェクトに追加します。
```bash lines theme={null}
curl --location --request PATCH 'https://{yourDomain}/api/v2/clients/{clientId}' \
--header 'Content-Type: application/json' \
--header 'Authorization: Bearer ' \
--data '{
"grant_types": [
"authorization_code",
"refresh_token",
"urn:auth0:params:oauth:grant-type:token-exchange:federated-connection-access-token"
]
}'
```
## トークン交換を設定する
外部プロバイダーの API を呼び出すには、アプリケーションで有効な Auth0 トークンを、Token Vault から取得した外部プロバイダーのアクセストークンに交換する必要があります。交換に使用する Auth0 トークンの種類は、クライアントタイプやユースケースによって異なります。詳しくは、[サポートされているトークン交換](/docs/ja-JP/secure/tokens/token-vault#supported-token-exchanges)を参照してください。
### リフレッシュトークン交換を構成する
[Token Vault を使用したリフレッシュトークン交換](/docs/ja-JP/secure/tokens/token-vault/refresh-token-exchange-with-token-vault)を利用するには、アプリケーションで次のグラントタイプを構成する必要があります。
* Authorization Code: アプリケーションが初回のユーザーのログインを実行できるようにします。このとき、アプリケーションは一時的な認可コードを Auth0 のアクセストークン、リフレッシュトークン、IDトークンに交換します。
* Refresh token: アプリケーションが、有効期間の長い Auth0 リフレッシュトークンを使用して、ユーザーに再度ログインさせることなく新たな Auth0 アクセストークンを要求できるようにします。
* Token Vault: アプリケーションが、Auth0 リフレッシュトークンを Token Vault に保存されている外部プロバイダーのアクセストークンと交換できるようにします。
リフレッシュトークン交換用にアプリケーションを構成するには、次の手順を実行します。
* **Applications > Applications** に移動します。
* 構成するアプリケーションを選択します。
* **Advanced Settings > Grant Types** で、**Refresh Token**、**Authorization Code**、**Token Vault** の各グラントタイプを選択します。
* **Save Changes** を選択します。
リフレッシュトークン交換用にアプリケーションを構成するには、`PATCH` 呼び出しを [Update a Client](https://auth0.com/docs/api/management/v2/clients/patch-clients-by-id) エンドポイントに対して行い、`refresh_token`、`authorization_code,`、`urn:auth0:params:oauth:grant-type:token-exchange:federated-connection-access-token` の各グラントタイプを client の JSON オブジェクトに追加します。
```bash lines theme={null}
curl --location --request PATCH 'https://{yourDomain}/api/v2/clients/{clientId}' \
--header 'Content-Type: application/json' \
--header 'Authorization: Bearer ' \
--data '{
"grant_types": [
"authorization_code",
"refresh_token",
"urn:auth0:params:oauth:grant-type:token-exchange:federated-connection-access-token"
]
}'
```
### アクセストークン交換を構成する
[Token Vault を使用したアクセストークン交換](/docs/ja-JP/secure/tokens/token-vault/access-token-exchange-with-token-vault)を利用するには、次を行う必要があります。
* `authorization_code` グラントタイプを使用して [SPA を構成する](#configure-your-spa)。
* SPA がオーディエンスとして指定することで Auth0 のアクセストークンをリクエストできる [バックエンド API を作成する](#create-backend-api)。
* Token Vault グラントタイプを有効にしたバックエンド API にリンクされた [Custom API Client を作成する](#create-custom-api-client)。
#### SPA を設定する
`authorization_code` グラントタイプを使用するよう SPA を設定します。これにより、SPA は Auth0 認可サーバーからバックエンド API を対象とする Auth0 アクセストークンをリクエストできるようになります。
`authorization_code` グラントタイプで SPA を設定するには、次の操作を行います。
* **Applications > Applications** に移動します。
* 設定するアプリケーションを選択します。
* **Advanced Settings > Grant Types** で **Authorization Code** グラントタイプを選択します。
* **Save Changes** を選択します。
SPA を設定するには、`authorization_code` グラントタイプをクライアントの JSON オブジェクトに追加するために、[Update a Client](https://auth0.com/docs/api/management/v2/clients/patch-clients-by-id) エンドポイントに対して `PATCH` リクエストを送信します。
```bash lines theme={null}
curl --request PATCH 'https://{yourDomain}/api/v2/clients/{clientId}' \
--header 'Content-Type: application/json' \
--header 'Authorization: Bearer ' \
--data '{
"grant_types": [
"authorization_code"
]
}'
```
#### バックエンド API を作成する
Auth0 の認可サーバーとアクセストークンの交換を行うバックエンド API を作成します。この API には、一意の識別子と必要なスコープを設定します。
Auth0 Dashboard でバックエンド API を作成するには、次の手順を実行します。
* **Applications > APIs** に移動し、**Create API** をクリックします。
* API を作成するには、[Register APIs](/docs/ja-JP/get-started/auth0-overview/set-up-apis) の手順に従います。**注:** 一度 API の識別子を設定すると、変更できません。
* **Create** をクリックします。
* API を作成したら、その API にスコープを追加する必要があります。**Permissions** タブに移動し、**Add a Permission** の下でスコープを追加します。
Management API を使用してバックエンド API を作成するには、`/resource-servers` エンドポイントに `POST` リクエストを送信します。
```bash lines theme={null}
curl --request POST 'https://{yourDomain}/api/v2/resource-servers' \
--header 'Content-Type: application/json' \
--header 'Authorization: Bearer ' \
--data '{
"name": "My API Resource Server",
"identifier": "https://my-api.example.com",
"scopes": [
{
"value": "read:calendar",
"description": "Read calendar events"
},
{
"value": "write:calendar",
"description": "Write calendar events"
}
]
}'
```
#### カスタム API クライアントを作成する
アクセストークンの交換を行うには、バックエンド API にリンクされたカスタム API クライアントを作成する必要があります。SPA は、Auth0 認可サーバーへの認可リクエストでバックエンド API をオーディエンスとして指定することで、そのバックエンド API に対するアクセストークンを要求できるようになります。カスタム API クライアントはバックエンド API と同じ識別子を持ち、「Token Vault」グラントタイプが有効化されています。
バックエンド API がアクセストークンの交換を実行する際には、カスタム API クライアントのクレデンシャルを Auth0 認可サーバーに渡して自らを認証し、Auth0 Dashboard に登録されたものと同一のエンティティであることを証明します。
Auth0 Dashboard でカスタム API クライアントを作成するには:
* **Applications > APIs** に移動し、バックエンド API を選択します。
* **Add Application** を選択して、アプリケーション名を入力します。
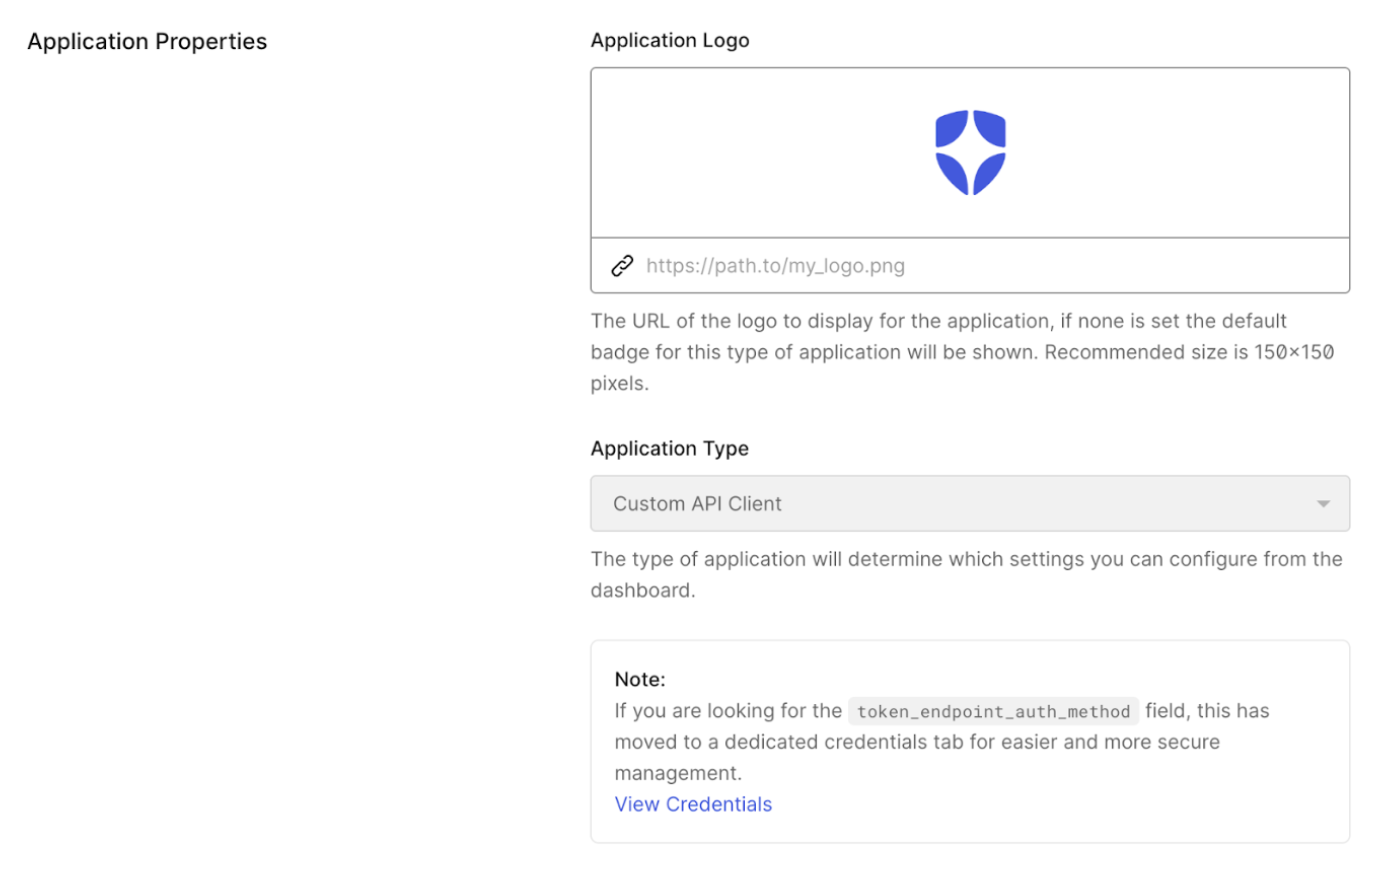
* **Add** をクリックします。アプリケーションが正常に作成されたら、**Configure Application** をクリックし、**Application Properties** までスクロールします。**Application Type** はカスタム API クライアントになっています。
* **Advanced Settings > Grant Types** の下で、カスタム API クライアントには **Token Vault** グラントタイプがすでに有効になっているはずです。
 次のコードサンプルは、バックエンド API と同じ識別子を持つカスタム API クライアントを作成し、Token Vault グラントタイプを追加します:
```bash lines theme={null}
curl --request POST 'https://{yourDomain}/api/v2/clients' \
--header 'Content-Type: application/json' \
--header 'Authorization: Bearer ' \
--data '{
"name": "Custom API Client",
"app_type": "resource_server",
"resource_server_identifier": "https://my-api.example.com",
"grant_types": [
"urn:auth0:params:oauth:grant-type:token-exchange:federated-connection-access-token"
]
}'
```
次のコードサンプルは、バックエンド API と同じ識別子を持つカスタム API クライアントを作成し、Token Vault グラントタイプを追加します:
```bash lines theme={null}
curl --request POST 'https://{yourDomain}/api/v2/clients' \
--header 'Content-Type: application/json' \
--header 'Authorization: Bearer ' \
--data '{
"name": "Custom API Client",
"app_type": "resource_server",
"resource_server_identifier": "https://my-api.example.com",
"grant_types": [
"urn:auth0:params:oauth:grant-type:token-exchange:federated-connection-access-token"
]
}'
```
| パラメーター |
説明 |
name |
カスタム API クライアントの名前。 |
app\_type |
カスタム API クライアントのアプリケーションタイプ。クライアントをリソースサーバーとして登録するには、resource\_server に設定します。 |
resource\_server\_identifier |
カスタム API クライアントの一意の識別子。バックエンド API のオーディエンス、つまり `https://my-api.example.com.` に設定します。 |
grant\_types |
カスタム API クライアントに対して有効化されているグラントタイプ。Token Vault グラントタイプ `urn:auth0:params:oauth:grant-type:token-exchange:federated-connection-access-token` を設定します。 |
カスタム API クライアントの作成が正常に完了すると、ログイン後、ユーザーは SPA ではなくそのクライアントにリダイレクトされます。